
Most people tend to think of photography as just simply pointing the camera and taking a photo. But there’s so much more to it than that! When it comes to traveling, getting that photo that will remind you of that precious time is a must! So I decided to compile a list of 15 photography tips that I find really useful!
I recently became a photographer, in the more practical sense. I have been taking photos as long as I have been traveling…but recently I began to take it seriously. And after I took it seriously, I really enjoyed photography even more! It helped me capture the moment and relive those exciting, happy memories! And I feel immersed now when I travel to foreign places and take more dramatic, dynamic photos. I specialize in landscape and urban photography, but these tips can apply to any style.
In addition to applying these photography tips to your style of photography, you can do more! If you are just starting out, some of these tips will be very useful. If you are just used to taking touristy photos, then these will also help a lot! And even if you’re a professional, maybe there’s something you didn’t consider before here. I’m hoping that this will help everyone, and you will enjoy these photography tips!
Please be aware that this post contains affiliate links. It contains links that go to other websites directly from this blog; giving me a small commission when you make a booking through the links on this page. This is at no additional cost to you, however. Thank you for your support!
1. Never Forget your Camera

This should go without saying…but surprisingly it is easy to overlook. A lot of people just don’t want to lug around a bulky camera. But if you are really looking to get amazing, crisp photos, a camera is a must! And not just any camera…the better the camera, the better the photos. And by “better” I don’t mean more expensive (more on that later)!
I would recommend a mirrorless camera for their light weight, as these cameras are much lighter than your typical DSLR camera and I find them more convenient while traveling. Of course there are many types, and it’s all about the features and what lens you pair it with. Getting the best includes checking the price, megapixels, stabilization, ISO, etc. My current favorite camera is the Sony a7III as it’s a great option for most photographers.
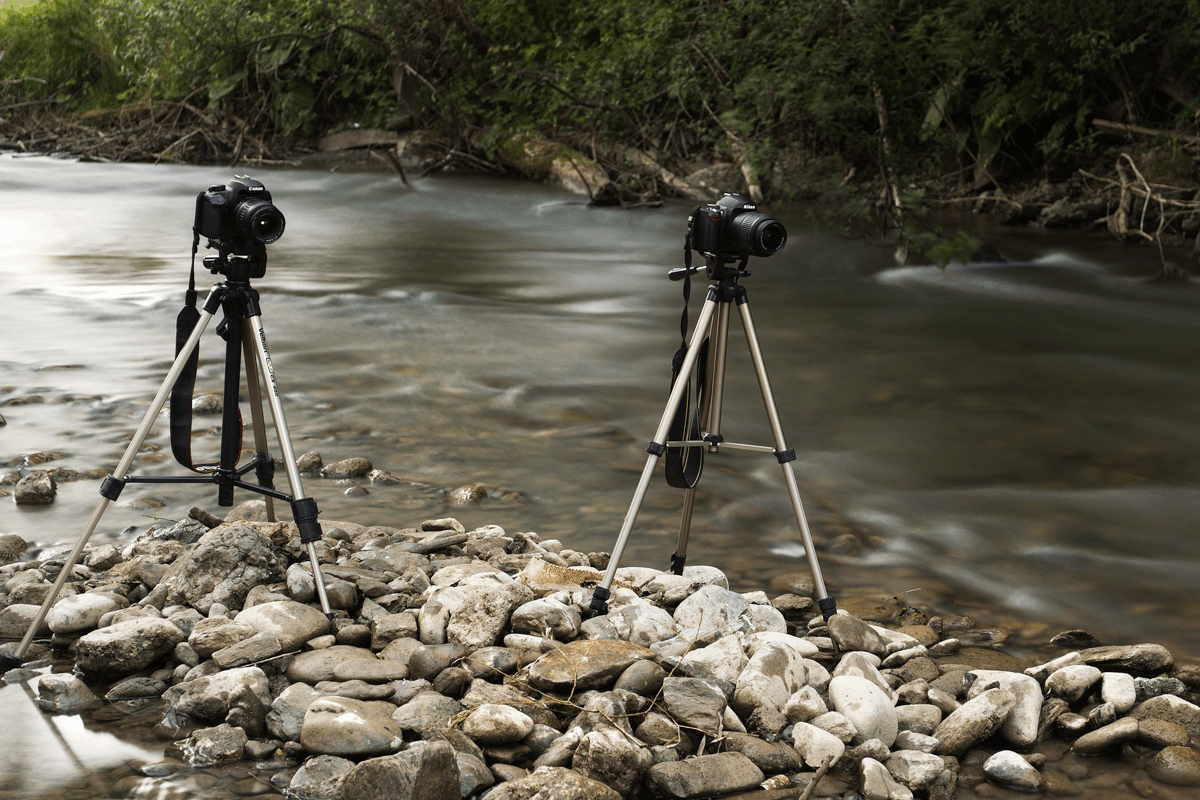
2. Bring A Lightweight Travel Tripod

One of the most important pieces of photography gear is the tripod. Of course the camera itself is a must, but a tripod is also needed. A lot of time there are no stable areas to rest the camera on for a photo. Also a steady hand might not be enough to get that crisp, clean image, as a slight shake could ruin a great photo. Additionally, a tripod is used for getting those smooth running water photos, low-light or for astrophotography.
While I did allude to some tripod options in my previous post about 20 Useful Travel Items to Pack, I wanted to expand upon that. One brand name that I really like is Manfrotto. They have several types of tripods, from a lower priced option to a mid-range one to a high-end model. It should be easy to find one to fit your budget, and it will be worth it to get that perfect photo! You don’t have to lug a tripod around every time you go out though! I like to plan my day and see if I’ll need the tripod for any of the aforementioned reasons.
3. Plan out your Locations in Advance

Speaking of planning, one of the last photography tips to do before you leave is to plan out your locations in advance. This is not just as simple as saying, “London” or “Japan”. It’s way more involved than that, getting to the actual locations within cities.
Location planning can involve doing Google searches and reading travel articles of famous landmarks, for example. Also you can use sites like Atlas Obscura to find more interesting places! Then, once you have figured out what to photograph, try to plan ahead. Try to find where that location is and how to get there. If something is best viewed when lit up, try to plan for visiting at night or during blue hour. If it looks best from certain angles, try to find less crowded times to get an unobscured view! Another thing to consider is the weather for the day and if it will affect your photos.
Planning ahead can save you a lot of time and trouble on your trip, so please do your research before your trip to get those perfect photos.
4. Keep Yourself Safe from Theft

Protecting yourself on a trip is important! And not just your possessions like money and luggage, but also your camera! You can take measures to protect yourself before or during your trip.
Some measures to protect your camera include attaching your camera to your body with a hand-strap or neck-strap. Also you should always be aware of your surroundings! Be on the watch for locations that could be dangerous to be around at times, especially at night. And even consider getting your camera insured (and the camera equipment too)!
Another useful tip is to secure your camera and components when you’re not using them. And before the worst happens (your camera is stolen), make sure to write down the serial number in order to help track it down & for insurance claims. Lastly, you could use an anti-theft bag such as the CADeN anti-theft bag or the BAGSMART anti-theft bag.
5. Expensive Doesn’t Equal Better

While this one might sound a bit contradictory to the last few points, there is a reason for it. Choosing the right camera and right equipment does not mean you have to buy the most expensive ones. Just because something is expensive doesn’t mean it is the best. That’s why choosing the right camera and equipment is crucial! Getting the camera or lens that suits the type of photos you want to take is important, like for astrophotography or long exposure shots. However, make sure you know how to properly utilize all of the functions of your current camera before upgrading your gear.
Consider not only the places you are going, but your skill level as well. Some cameras are beginner-friendly. Others are for novices. And then there are ones for professionals. Find the camera that fits your level and it will help you ensure you are not wasting your time and money. You can even experiment with your phone’s camera and get incredible shots!
6. Arrive Early or Stay Late

Most famous attractions such as Rome’s Colosseum, Paris’ Eifel Tower and Milan’s Doumo can be super crowded with people during peak times, so plan to use your time wisely. By this I mean arrive early to the location or go an hour or two before closing time (if it’s an attraction with set hours), when possible. There are several reasons for this. First of all you can usually avoid most of the tourist crowds this way. Of course this depends upon the location and time of year, but in general.
Moreover, noon-day photos usually have harsh lighting as everything is too bright (unless it is overcast that day). Speaking of which, cloudy days often make the sunlight more diffused; spreading it out and creating softer shadows than direct sunlight does. Regarding sunrise and sunset, you can capture backgrounds at those times for more dynamic, dramatic photos overall! Lastly you might see something different during different times of the day, and get different looks to your photos!
7. Getting Lost (Purposefully)

While you’re out there on vacation, lose your way too! Not in the literal sense (always know where you are on vacation)…but in the metaphorical sense. Always be sure to know where you are, or at least how to get back if you do get lost. For example, take a photo of a map or write down the name of your hotel to show locals for directions.
What I mean by losing your way is to explore the area. Of course make sure that the areas you are going to are safe first (probably check with local shops or people in the area). But once you do, explore! Check out nearby streets, trails, and viewpoints. Look around for something that wasn’t on your trip plan, but looks interesting. Find that niche spot no one knows about and capture a photo that will have everyone asking, “Where is that?!”
8. Patience is a Virtue

One of the photography tips that people don’t consider is being patient. Patience really is a virtue in photography. But that is okay…just be patient. Try to find something else to do in the meantime. Even if you have to wait 5-10, maybe even 15 minutes…it’ll be worth it if you can get that photo! Because if you leave, you might miss that opportunity or not be able to get it back again.
Sometimes you might arrive at a location during a very busy time. And if you are trying to get that perfect photo, you might have to wait. And wait a long time! You can take the time you are waiting to make sure your camera settings are perfect or maybe you can just sit and wait for the perfect moment to get that photo of a lifetime! But be patient…it’ll be worth it!
9. Try Out Different Composition Techniques

One thing you could do while waiting patiently in the last tip is experiment. This can be done anytime, though. Normally you take photos just from a straight-on view, but you can try other angles as well. Maybe it would help to lean over further to see more. Maybe you could stand on a nearby rock for a higher perspective. The point is that you might find something better than your original image by experimenting.
When you are just taking photos of interesting things, this is a good time to try out techniques. Maybe try a Dutch Angle. Maybe focus on the foreground more than the background, or vise-versa. Maybe try different angles with the tripod to see what looks best. There’s so much to do and it might just make that great photo even better!
10. Use the “Rule Of Thirds”

A common technique to consider is the rule of thirds. A staple of photography tips, the rule of thirds is a must for taking photos to the next level! For those who are not aware of what the rules of thirds is, it’s simple. All you do is place the subject of the photo in the left or right third of the image.
The rule of thirds leaves the rest open for background or just open area. It creates a more appealing, generally more compelling photo in the end! Some photography tips for this is to use your camera’s gridlines (if it has a display for it), and always have the horizon leveled out perfectly.
11. Manual Mode is Sometimes Better than Automatic

Despite cameras having more and more features now, sometimes your own judgment is best. Sometimes you can find the best setting manually, and this is called shooting in Manual Mode. Almost all cameras are automatic now, but that doesn’t make them great at photography. Sometimes the human eye and mind are better than automatic camera settings.
If you are taking photos and they just don’t look right, you can manually adjust things. Some of them include the ISO, shutter speed, and/or aperture. You can adjust these settings on the camera itself to get that perfect photo!
12. Take Advantage of “Leading Lines”

Leading lines are another one of those staples of photography tips you hear about. What this means is to find something that draws the eyes of the viewer to a focal point. This doesn’t have to specifically be “lines” like actual lines on a road…any lines work!
For example, the meandering of a coast could lead to a lighthouse. Or railroad tracks to a station. Or a sidewalk leading to a person of interest. It can be anything! And the angle doesn’t always have to be dead-centered either…any angle that leads to the focal point works!
13. Have a Spare Copy of your Trip Photos

I can’t tell you the number of times this has happened to me! I have lost lots of photos from my past trips…I still can’t find them to this day! Don’t let that happen to you! Backing up your photos is so vital, so be sure to do it properly!
This can include Cloud storage services online, or physical methods. Some include a portable hard disk, USB flash drives, or a laptop. Even a backup SD card for your camera might be a viable option! You could even resort to having a friend or family member back home with spare copies of your photos/videos sent to their email, if you do not trust yourself to not lose the spares. There are a lot of ways to do it…but just be sure to do it!
14. Experiment while Post-Processing your Photos

Once the trip is over, there is still one more of the photography tips you can do at home. This is post-processing of the photos you took! And no, post-processing your photos is not “cheating”…it is simply enhancing what is already there. Every photographer does it, whether they admit it or not.
While you did your best while you were on-location and taking photos, you can always do more at home. You can use programs like Adobe Lightroom, Photoshop and more to edit those photos! Play with the contrast, exposure, vibrance, and sharpness of the photo. Try adding effects like vignetting and noise reduction. And you can even use presets for those features that you love, or find ones from others that really appeal to you!
15. Always Learn Something New!

The last and final of the photography tips that I can give you is never stop learning. You might feel like you’ve learned it all and done it all, but there’s always more to learn. For photography, online classes are very helpful! If you find yourself feeling like you know everything about one style of photography, try out another!
New cameras with better options are always coming out in the future. And people will always discover ways to make great photos even greater! And you can do the same by always learning more! And this is something you can do anytime…before the trip, during it, or after it at home!
Photography is one of those skills that can be learned in a day but takes a lifetime to master. And I hope you were able to find some useful photography tips in this post! I am not a master, of course…I am always learning new things too! Did you find anything new? Do you have any tips yourself? I’d love to hear from you in the comments!
Liked this post? I would greatly appreciate it if you pinned it and share it around!


Be sure to follow me on Instagram and check back often for new updates to your favorite places! Have a suggestion? Comment and let me know where you would like to know about, get more information on, or just to give me your feedback!